Feeds:
Posts
Comments

Peanuts!

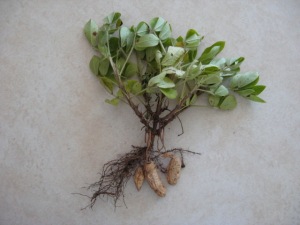
I saw a packet of peanut seed from the Ontario Seed Co. this spring and bought it on a whim. I had no idea that peanuts would grow in our area, but the back of the seed packet said they would, so I thought I’d give it a try. Not many seeds in the packet, just enough for one 8-foot row. They came up, and they flowered, and then they didn’t seem to do anything else. I read up on peanuts and they are supposed to throw “pegs” out which arc back into the soil and that’s where the peanuts grow. Well, I imagined these “pegs” as large (or at least visible) shoots, and I never saw any… So I figured they hadn’t made any… We’ve had a bad, bad drought all summer, and I didn’t irrigate the peanuts, I just gave them a couple of gallons of water a few times during the worst of the drought. So I figured they hadn’t “set fruit” (or in this case, nuts).

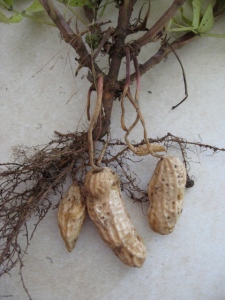
This afternoon when I was picking the ripe tomatoes (yes, our tomatoes are still ripening in mid-September – we’ve had a rough year!) I decided to pull one of the peanut plants, just to see. The book said to leave them until the leaves turned yellow, and mine are still green, but curiosity finally got the better of me and low and behold – there were peanuts!

Just a couple (I pulled one of the smallest plants), but actual honest-to-goodness peanuts had grown in my garden! I’m totally thrilled, and will be planting LOTS more next year. The best part is that they grew with hardly any irrigation in a summer of severe drought. Since our local climate seems to be getting hotter & drier in the summer, this is so good to know!

I make all our jams & jellies, but we buy a fair bit of peanut butter and roasted peanuts. Knowing I can grow our own peanuts makes me feel like I’m one baby-step closed to self-sufficiency. We have hazelnut and walnut trees that should start to bear in the next couple of years, so the addition of peanuts and sunflower seeds expands our options for reasonably reliable non-animal protein.

It turns out that the “pegs” I was looking for and not seeing were the little shoots that come off near the bottom stems and burrow almost straight down into the soil under the plant. Next year I’ll know what I’m looking for!

Time to start researching my options for a food mill / grinder that has attachments to handle both cereal grains and oily nuts…

A Spell for a Fresh Start – Part One

On Monday, we came home from our annual week-long summer camping holiday at Canada’s largest Neo-Pagan festival, Kaleidoscope Gathering. We had a truly fantastic time, spent time with friends, met great people, gave a Tarot workshop, attended workshops and rituals, and relaxed at our lovely campsite by the river.

Tuesday we spent trying to come back down to earth, and I went to pick up our pup Carter from his foster parents in Ottawa.

Wednesday morning t! went back to work and I started the day with some time in my garden, and did a morning meditation & tarot card draw, followed by some very useful and cathartic journaling. Four hours later I found myself typing a resignation letter for the part-time job I’m currently doing. I hate it, it sucks my time and energy, chains me to the computer indoors when I want to be working outside, and the person I’m working for is a nasty bully. Plus I’m severely underpaid, and the number of hours I’m billing per month add up to little more than pocket change. The only reason I haven’t quit before now is that I was afraid that if I tried to quit, he would bully me into changing my mind and I would end up feeling even worse about myself and the job!

After I hit “send” on the email, and the proverbial weight was lifted off my shoulders, and I started thinking about how to make (or mark) a “fresh start” on this new path.

One of the books I pulled off my bookshelf after we got home from Fest was my friend Arin Murphy-Hiscock’s Hearthcraft book (which the publishers insisted on calling The Way of the Hedge Witch, even though it’s about hearth & home magic.) And while flipping through it again, I started thinking about the energy in our home, and how it affects me and makes me feel. Making our home more welcoming, cosy and “homey” is something I’ve been wanting to do for a long time, and something that the icky part-time job was specifically stopping me from doing, for a variety of reasons. My own spirit feels renewed and refreshed after spending a week at KG, and I want to expand that sense of renewed energy to my immediate environment, our home. So my Spell for a Fresh Start is going to centre around clearing all the old, stagnant, negative energy out of our house and replacing it with fresh, happy, productive, creative energy.

I decided that the first thing I needed to do was get rid of anything in the house that was dead and/or decaying, in order to banish stagnation, death, and decay from our environment. So yesterday:

  • The dried remains of some flowers got composted and the vase they were in thoroughly washed
  • I cleaned all the science experiments and soggy vegetables out of the fridge, and washed out the veg drawer
  • I cleaned up all the hairballs that the cats had horked up in the basement while we were away for a week
  • I took the dead mole out of the freezer[1]
  • I washed out the two coolers from the camping trip and all the icky tupperware containers that had held our camping food, and
  • I even snipped all the dead leaves off the houseplants.

Then I went out for a walk with Carter, and picked a fresh bunch of wildflowers – wild purple asters as it turns out – and put them in the clean vase.

Today I will start on sweeping, to further clear the stagnant energy out of the house. Since we have a big house,  sweeping (and vacuuming, for rooms that have carpeting) will probably take me two or three days (or more, now that I remember that I have to pick everything up off a floor in order to sweep it). I’ll try to get into every nook and corner of every room (except t!’s office, but he thoroughly cleaned it before our vacation), which will mean moving furniture, and get all the cobwebs off the ceilings too. As well as cleaning, and sweeping away any stagnant energy, this should also get rid of the last of the dead bugs off the windowsills, etc. And now that I realise what this plan entails, I’m thinking it may take me up to a week! That’s OK, I have some spare time while I’m waiting for the tomatoes in the garden to ripen so that I can start the canning…

I’ll check in again in a couple of days to talk more about how it’s going[2] and what I plan to do next.

.

[1] SKIP this paragraph if you are squeamish. You have been warned! The cats, as they are wont to do, did a lot of barfing while we were away. When t! when down to the basement after we got back, he found a mole in the basement, eating the half-digested kibble in the cat barf (ewww!) Not having a better plan (he couldn’t bring himself to simply step on it), he put a mouse trap next to the pile of cat barf. An hour later when we checked the trap, the mole was caught but not yet dead. We scooped the mole into a plastic bag and dropped it into the freezer – death by hypothermia is one of the kindest ways to go, and how I usually dispose of deformed baby chicks.

[2] Yes, I know traditionally you’re not supposed to talk about a spell while you’re doing it. I don’t know who made that rule, but like with everything I do, I follow what feels right to me regardless of what the books & traditions necessarily say. That’s one of the reasons I’m a Green Witch and not Wiccan. Plus, how are us Solitary Witches suppose to learn anything if we don’t share? Sometimes when I do I spell, I tell no one about it, not even my husband. But this one feels right to talk about. So I will.

Hail

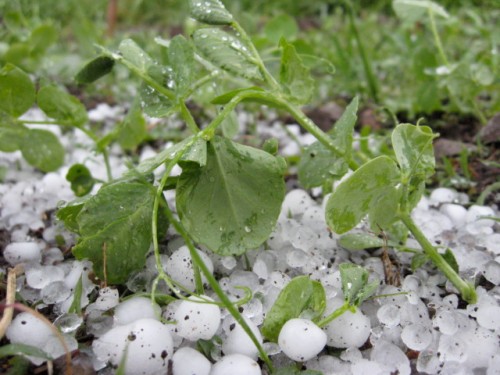
This is not the post I was planning to write today, but I just lost almost half of the vegetable garden to a bad hailstorm:

The dog, one of the cats, and I were all outside when it hit, and we are all fine. I stupidly thought I had time to take the dog for a short walk on my neighbour’s property before the rain hit – and I was sure it would just be rain! The skies were dark, but the thunder and lightning seemed quite far off. I made a sprint for home the minute I realised that the odd noise I was hearing was hail hitting the trees behind the field across the road. I called the dog and ran for it, but only made it half-way up the trail to the road before the hail storm hit, and hit hard. Carter and I stood in the middle of the hedge to avoid the worst of the hail. Next time the Environment Canada weather forecast says,

“Severe thunderstorms are imminent or occurring in the area. These storms may produce large hail, damaging winds or heavy rainfall. Remember that some severe thunderstorms can also produce tornadoes.”

I won’t go out!

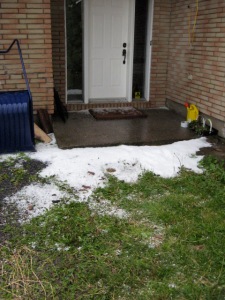
Drift of hail at our front door:

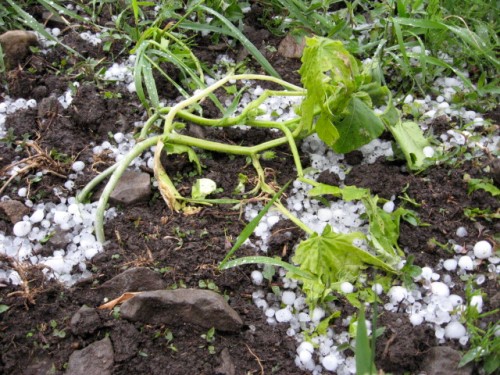
The zucchini and winter squashes were the worst hit – the plants were just smashed to pieces:

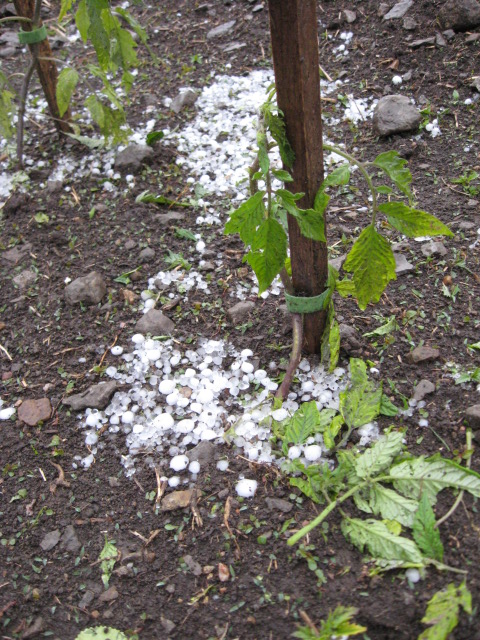
The peppers aren’t likely to recover, but I’m hoping that the tomatoes will – most have damage to the leaves like this, but the plants were strong and growing well before the storm, so they can stand to lose a few leaves:

The potatoes will hopefully be OK, but I’ve probably lost the beans…

It’s really quite disheartening.

Speedy-au-vin

My friend Amanda writes a food blog called The Mindful Table. Recently she linked to an article written by someone who raises their own backyard chickens, and who tried to make coq-au-vin with one of her old laying hens. I say “tried” because she gave up after simmering the chicken for 4 hours, deciding that the meat would “never be tender” and she substituted a store-bought chicken. I was disappointed to read this, because it implied that older chickens are inedible, even in a dish specifically designed to use them, such as coq-au-vin. I have been planning to make coq-au-vin for a while, and we had plans for a dinner guest this past Saturday evening, so the article inspired me to make my own attempt at coq-au-vin.

I used Hugh Fearnley-Whittingstall’s recipe from The River Cottage Meat Book. In the description of the dish he says, “This is a great dish but there is no doubt it has fallen out of favour. The reason is simple: the central ingredient – a farmyard cockrel… – is almost impossible to lay your hands on.”

As we have our own chickens, and thus, “spare roosters,” there was no problem in obtaining the central ingredient:
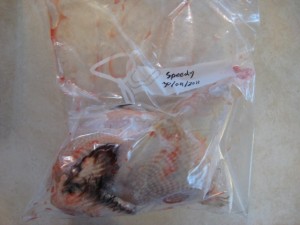
Those of you who have been reading this blog for a while may well remember the Saga of Speedy – how he got his name by being too fast to catch for slaughter during our first year of chicken-keeping, and then how he was too rough on the girls, and Chief (our alpha rooster) started chasing him off. How he spent a summer living on our (very accommodating, elderly Estonian) neighbour’s front lawn, and how once we had a replacement rooster (one of The Twins – who have their own story – livestock keeping is full of anecdotes) we dispatched Speedy. He’s been sitting well-wrapped in our freezer ever since, and this weekend he was going to make his (hopefully) triumphant final exit.

The actual difficult-to-obtain ingredient was “250g salt pork, pancetta, or bacon, in chunky pieces.” I.e. un-sliced. Unsliced bacon (or salt pork) can be bought in your average North American supermarket. But we only eat local /  organic / naturally raised meat. And I wasn’t going to let the results of the commercial pork-farming industry anywhere near one of my own organic chickens!

While working at the Champlain Commercial Fair this past March, I met the folks who run Bearbrook Game Farm and asked if they might have any unsliced bacon. They kindly found me a piece of wild boar bacon – so I had the other key ingredient for the recipe in my freezer. 250 grams ended up being half of this piece. Expensive, yes – but it was the only expensive ingredient in a fancy dinner for 4 people (after all, the chicken was “free,” right?)
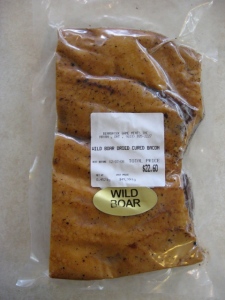
Having taken both Speedy and the bacon out of the freezer to defrost in the fridge on Friday morning, Saturday morning I was ready to start preparing the dish. The only major departure I made from Hugh’s recipe was that instead of cooking covered “over a very low heat, or in a very low oven (120°C Gas Mark 1/2) for about 2 – 2 1/2 hours, until the meat is completely tender,” I simmered it on “low” in the slow-cooker for 5 hours. I have learned through experience that I enjoy the experience of having dinner guests a lot more if the meal I’m going to serve is done and bubbling gently in the slow-cooker when my guests arrive!

Ingredients:
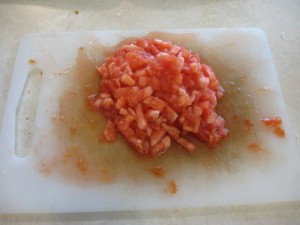
Tomatoes, skinned, de-seeded, and finely chopped. I was, unfortunately, using conventionally grown vegetables, due to the time of year. Next time I make coq-au-vin (and there will definitely be a next time), I’ll do it in the fall when I can get local organic veggies. I noticed that the skins on the tomatoes were much thicker then the ones I grow (or the ones I buy at my local farmer’s market) for processing into home-canned tomato sauce – to better withstand transport, of course…
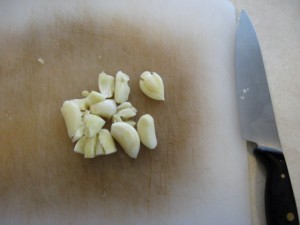

Garlic. The recipe calls for “4 garlic cloves, bruised” I used “a bunch” of garlic – we like our garlic – and decided that “bruised” meant “sort-of-crushed with the flat of the knife.”
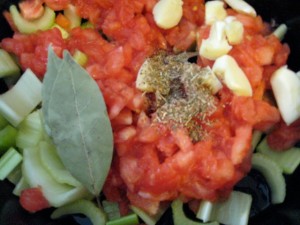
My other departure from the recipe was to dump a teaspoon of thyme and a couple of bay leaves into the slow-cooker with the vegetables, rather than making a “bouquet garni.”
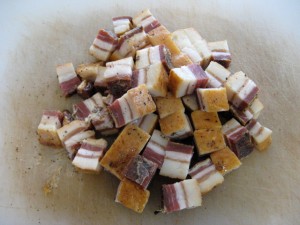
“250g salt pork, pancetta, or bacon, in chunky pieces.”
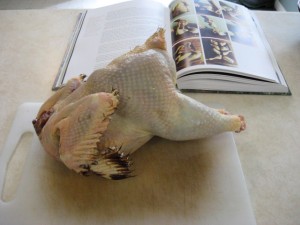
Now comes the difficult part – difficult, because I don’t have a whole lot of practice at it – jointing my chicken. In February of this year I spent an afternoon taking lessons on how to joint a chicken and chop vegetables efficiently from a local vegetable-grower who used to be a professional chef (he has flat feet and couldn’t deal with the 12-hour shifts in the kitchen, so he quit chefing and now grows vegetables for the local farmer’s market on his family farm instead…) It was time and money very well spent, and I mostly remembered what I was doing. The illustrations in Hugh’s book helped remind me of the finer points. The legs come off easily. The hardest part was splitting the breastbone with a heavy cleaver to separate the halves of the breast while leaving them on the bone.
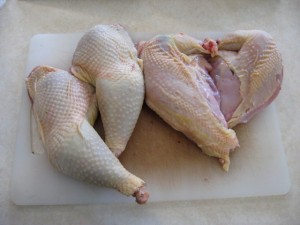
2 leg portions and 2 breast portions.
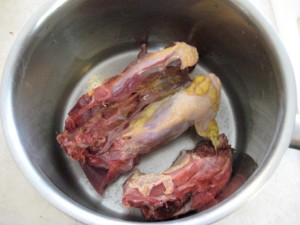
The neck and the back in a pot, ready to be boiled up for stock.
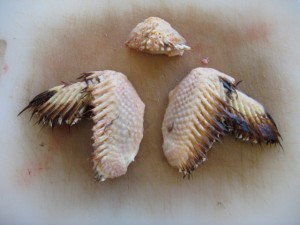
The leftovers, 2 wings and the tail. As is traditional, these pieces went to the dog and cats.
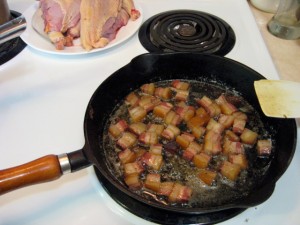
Because this is a Hugh recipe, you start by frying the chunks of bacon in 1 tablespoon of olive oil and approximately 3 tablespoons (50 grams) of butter. A couple of chopped onions get browned in the fat, and then in go the chicken portions for browning:

Hmmmm…. I think I need a larger frying pan.

Now for the FUN part! The recipe calls for 1/2 a wineglass full of brandy and 500 ml of red wine. The brandy is French. The red wine is my favourite VQA (local Ontario wine) from Pelee Island Winery.
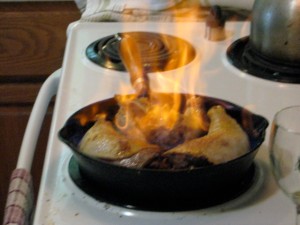
Speedy flambé.

Simmering in the slow-cooker. A couple of hours later I tasted the sauce. Delicious (and not at all too salty, which I was a little worried about, considering how salty the bacon tasted to me) but very, very fatty. I ladled off 500ml of sauce into a Pyrex measuring cup and put it in the fridge, so that I could separate out some of the fat. An hour before my guest arrived, I took the chicken pieces out of the slow-cooker, strained the liquid into a pot, and started reducing it. I took the reserved portion out of the fridge, skimmed off the excess fat (Gods!The fat!) and added it to the reducing pot. I probably should have boiled it down more than I did.

I returned the reduced liquid to the vegetables, bacon, and chicken pieces, and let it simmer gently in the slow-cooker until we were ready to eat. We had the chicken and sauce with kugelis (traditional Lithuanian potato pudding) which our guest brought, and a bottle of Château des Charmes (VQA) red wine.

It was absolutely delicious. The meat was perfectly tender, and tasted of chicken – despite having been simmered in red wine and bacon sauce for 5 hours! And it probably took less time to make the recipe than it did to write this post – the longest part was jointing the chicken. I will certainly make it again, served with boiled new potatoes if we don’t have a guest bringing Lithuanian kugelis.
Seasonal magic – Green Witch style

I don’t follow the Wheel of the Year, but Spring is the season for growth, renewal and new beginnings, so today I did some magic:

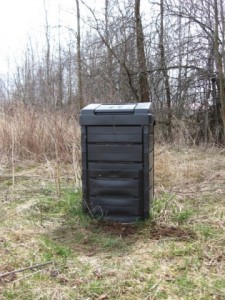
First, I poured out all my fears onto a sheet of paper – writing furiously until the paper was full. I took the sheet out to our compost bin, and buried it deep under a layer of mould and rot and ash. Then I opened the door at the bottom of the bin and scooped out a bucket full of fresh, crumbly compost.

I took my bucket, shovel, and an egg out to the vegetable garden. I dug a deep hole and lined it with seeds and herbs. I whispered my dearest hopes and dreams to the egg, and then carefully planted it in the hole with offerings of tobacco, rose petals, sacred water, and a bucket of fresh compost.

May your fears crumble away and your dreams grow strong. Happy Spring.

Happy Spring everyone, and for the first time that I can remember, we are indeed having spring this week! The crocuses are up, the birds are singing, the chickens are laying, and maple syrup season (such as it was) is over. I even saw a ploughed field when I was walking the dog yesterday. Usually at this time of year, there’s still a fair amount of snow on the ground out here, and greetings of “Happy First Day of Spring” are greeted with a sarcastic “Yeah, right.” Being the realist (some would say pessimist) that I am, I’m not expecting our unseasonably warm weather to last. I think we’ll get walloped at least once more at the beginning of April. As I over-heard one old farmer saying to another this past weekend, “Remember that year we had snow on Mother’s Day?”

Unseasonable weather or not, I’m thinking about this year’s vegetable garden. Every year I agonize over when to start the seeds indoors, and when to plant them out. This year I started the peppers (bell and hot) an extra two weeks early, because last year they didn’t start setting fruit until September, and then the frost got the golf-ball sized still-green peppers. That may have had something to do with the drought we had for the entire month of July, of course.

I started the peppers on March 4th, and they are just starting to come up today. I’ll be starting the tomatoes this week, and crossing my fingers that I’ve guessed right. Start them too early and they get leggy in their pots, which makes the stems prone to snapping when you’re planting them out or when a breath of wind hits them. Start them too late and you don’t get them into the garden until June, and then you don’t get any tomatoes until August.

The seed packets, gardening books, and websites helpfully give you the following information, “Start seeds indoors 6 to 8 weeks before last frost,” which seems simple enough, right? Find out when the average “Last Frost” date is in your area, count back 6 (or 7 or 8) weeks, and that’s when you start your seeds.

Problem #1: “Last frost” dates are listed for major cities, not small villages in the middle of nowhere. The weather is so variable in this part of the country that using the “Last Frost” date for Ottawa or Montreal would be about as accurate as throwing a dart at a calendar page.

Problem #2: The most recent and up-to-date “Last Frost” data available for Ontario is based on average temperatures calculated from 1976 to 2005. The climate is a-changin’, as seen by the fact that I’ll be walking the dog in shorts and a t-shirt this afternoon, when there is usually still a foot of snow on the ground this time of year. Tomorrow’s forecast high is 28°C – the normal high for this time of year is 4°C. Historical averages are becoming less useful. The best data available from Ontario, however, is here: Climate Zones and Planting Dates for Vegetables in Ontario (Note that most books and websites are using much older data, typically the American USDA maps which are based on a 1953-1980 data set).

Problem #3: (And this one is the “gotcha” that prompted this post) “Last Frost” is a fox terrier.

Ok, that obviously needs some explanation: a “fox terrier” in this context is a “canonical” phrase or idea that gets repeated by authors in texts without being examined or re-examined. The phrase was coined by the wonderful natural science author Stephen J. Gould. Gould was writing an essay on the evolution of the horse, and he found himself typing a description of “Hyracotherium” as being the size of a fox terrier. Then he stopped and thought to himself, “Why am I typing that, when I don’t even know what a fox terrier looks like?” His subsequent research on the topic found descriptions of this particular ancestor of the modern horse being compared in size to a fox terrier, in an unbroken line of textbooks dating back over 100 years. He asked around his department, and none of his colleagues knew what a fox terrier looked like, or in fact exactly what size it was, though they had taught out of those same textbooks for years. He then wrote a further essay on the topic, “The Case of the Creeping Fox Terrier Clone.” 1

Here’s the thing I realised that changed the way I think about planning to plant the garden: The idea that you “should” be able to prepare your soil for planting well before the average “last frost” date comes from gardeners writing gardening books in England, where it doesn’t snow, and hardly ever freezes! Like Gould’s dinosaur descriptions, authors of gardening books have simply repeated, “6 to 8 weeks before last frost” whenever they talk about starting tomato seeds indoors. “Aha,” I thought to myself one day, as the cartoon lightbulb lit up over my head, “‘Last Frost’ is a fox terrier!” If you are gardening under perfect conditions, in an “average” (whatever that means these days) year, then the Last Frost data is probably all you need. Spring comes, the snow melts, the ground dries out, you turn it over and prepare your seed bed, and you plant according to the information on the backs of the seed packets. No problem.

But in my experience out here, about half the time, the veg patch is still under water on our putative “last frost” date. We don’t have particularly bad drainage, but some years it rains for all of April, and there’s just no way we can get the rototiller (or a person with a fork) into the garden by May 11th (our official “last frost” date). So the seeds whose packets say “plant out as soon as the soil can be worked” (which in Oxford, England, where the gardening books were originally written, is sometime in mid-to-late February) get planted in late May, at the same time as the tomatoes and the potatoes and everything else, because that’s when I can plant!

Now I’m not faulting the books, websites, or seed packets for using “last frost” date as an instruction for when to start seeds. Of course you want to set our your young plants after the last frost, whenever that should be. And of course you want to give new gardeners some sort of guidelines other than “in spring” (though I’ve seen that on the back of a seed packet, too!) But I’ve come to realize that “in spring” is really the best we can do, most of the time. 8 weeks before May 11th, I have no way of knowing if it’s going to be cold or warm, wet or dry for the next two months. I don’t know if I’ll be planting out my tomatoes on May 6th or June 6th.

So I’ve changed my thinking from “I have to have the garden ready to plant the tomatoes out on May 11th,” and feeling like a failure every year that I can’t, to “It’s probably not wise to plant the tomatoes out before the second week of May or so, most years.” I’m hoping it’s going to make me a much more relaxed gardener.

Happy Spring!

1 Stephen J. Gould Bully for the Brontosaurus: Reflections in Natural History. 1991.

Recipe: Green Tomato Chutney

It’s tomato time out here, which means that very soon it’s going to be green tomato time, too. In fact, last Saturday when I was filling in for the manager of our local Farmer’s Market, a customer asked the vegetable seller next to me if he had any green tomatoes. He said he had lots, in his field, and if he had known people wanted to buy them, he would have brought some. He promised to bring some for her next week. She wanted to make green tomato pickles, which in my house growing up we always called Green Tomato Chutney. I make a big batch every year, and eat it with Egg Pie, or on toast with or without cheese. I find it particularly welcome in May when the winter is over, but none of the fresh veg is available yet. The funny thing is that my British mother’s “family” recipe for green tomato chutney actually comes from her French Canadian neighbour, Andrée. Here it is:

Ingredients:

  • 8 pounds (approximately 3.5 kg) of green tomatoes (about 32 medium-sized tomatoes)
  • 6 large onions
  • 3 cups (750ml) vinegar
  • 3 cups packed brown sugar
  • 1 tablespoon coarse salt
  • 1 teaspoon each of ground cloves, cinnamon, and mace


Method:

  1. Chop the tomatoes and the onions, and put into a large stock pot.
  2. Bring the mixture to a boil in it’s own juice.
  3. Simmer on low heat for 30 minutes.
  4. Add the rest of the ingredients and let simmer, uncovered, until the mixture starts to thicken. Then let it simmer for another 20-30 minutes, stirring regularly to prevent it sticking.
  5. While it is thickening, prepare your canning jars, lids, and rings.
  6. Ladle hot chutney into hot jars and seal. Process in a boiling water bath canner for 15 minutes.

Makes approximately eight 500ml (1 pint) jars.

Wild Wine: Part 2

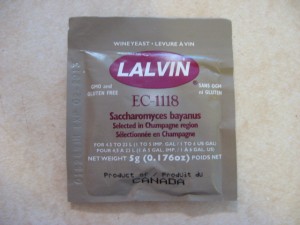
After all the picking, and picking over, and pressing, and settling, and filtering was done, I had 1.35 liters of very strong, very dark, very bitter wild grape juice. Cobbling together a recipe from various sources, but relying heavily on the information here and here, and the wine-making section of my copy of The Complete Guide to Self Sufficiency by John Seymour, I decided to add enough water to bring the volume up to 4.5 liters, enough sugar to (hopefully) achieve a sweet dessert wine, and to make a trip to a local home-brew supply shop for a packet of real wine yeast. If, John Seymour, the Grandfather of self-sufficiency thinks it’s worth the $2.30 for a packet of wine yeast, then I believe him!

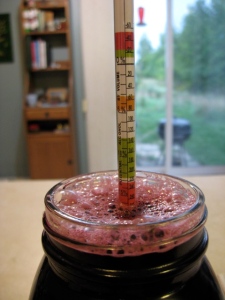
So I added 2.65 liters of water to my grape juice, and stirred in a half a Campden tablet (to “sterilize” the grape juice, or kill the wild and rogue non-wine yeast that are likely to be in it) because my kitchen is full of bread yeast, which apparently makes poor wine. Then floated my hydrometer in a liter jar of juice. I got a beer and wine-making kit for my birthday with included this neat gadget that measures the specific gravity of a liquid via Archimedes’ principal, and thus tells you how much sugar (and therefore potential alcohol) is in your grape juice. As it turned out, not very much, which was no surprise at all. Eastern Ontario is not known as a grape-growing area, and despite the blistering heat we had his summer, my wild grapes were still far from sweet.

I added 1 kg of sugar, aiming for a quite sweet, fruity dessert wine, (which I figure I have a better chance of hitting than I do a “nice dry Chablis,” for instance) which gave my grape juice a specific gravity of 1.12, and a potential alcohol content of 16.5% I’m aiming high rather than low because all the sugar might not convert, and you need enough alcohol for the wine to preserve itself once it’s bottled, otherwise it will go off instead of maturing.

Then I added the yeast. And absolutely nothing happened. Now, this is my first attempt at wine, and I don’t know what is supposed to happen. My first batch of mead bubbled and frothed nicely when I added the (instant bread) yeast. The grape juice just sat there. I covered it over and left it overnight. In the morning I looked in the bucket, and still nothing, or not much of anything, anyway.

Time for intervention. I brought the temperature of the grape juice (which I should probably start calling “must,” to use the technical term) up to 75°F (my wine-making instructions are all in either American or 1950s British, which is OK, because my canning thermometer is in 1905 British units) by sitting a tall glass jug of hot water in the bucket, in case the problem was that the yeast was too cold. And I added a quarter teaspoon of “yeast accelerant” (those of you keeping score will have noticed that my home-brew shop purchases went slightly beyond a single packet of wine yeast).

Then I covered it up again, and sat it in a sunny corner of the kitchen, and tried hard not to check on it every 10 minutes. 12 or so hours later, it is definitely doing something that is starting to look like fermenting. Pinky-purple-y foam is forming on the surface of the grape juice must. Now all I need to do is figure out how to keep it warm for a week. Right now the bucket is sitting in the corner of the kitchen by the stove, because I just took two loaves of bread out of the oven. I’m hoping it doesn’t get too cold overnight, but I’m not turning the heating on just for the wine, that’s for sure. Maybe I’ll drape a blanket or something over it.

Wild Wine: Part 1

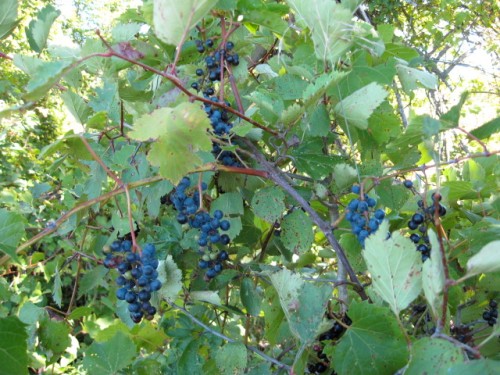
One of the things I’ve learned living out here is that the wild things that grow and live on our little patch vary tremendously each year, due in large part, I suppose to the differences in annual weather. Some years the roadsides are full of Mullen, but this year there are only a few plants here and there. Last year this time, my neighbour’s fields behind our property were full of Black-Eyed Susans, this year there are only a few. We’ve had a hot, dry summer here, and so the crickets and grasshoppers are particularly abundant this year, making our chickens very happy indeed as they hunt the hoppers through the grass. Something else that has had a very good year this year is Wild Grapes:

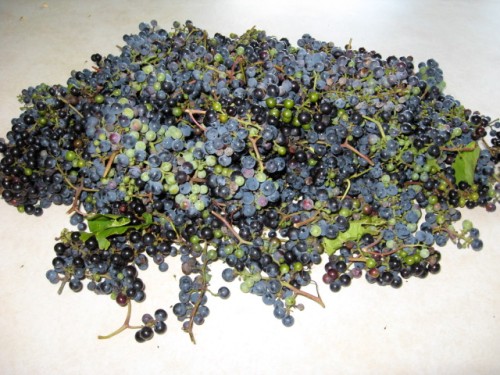
There are always some wild grapes in the hedgerows, but most years it is too wet for them to grow well and mature without rotting. This year the hot dry weather provided a bumper crop of wild grapes, so I’ve decided to harvest some and see what kind of Wild Wine I can make. At first I was just thinking that I would get some juice to make a small experimental batch of wild grape-flavoured mead, but I might get enough juice to try a very small batch of wine.

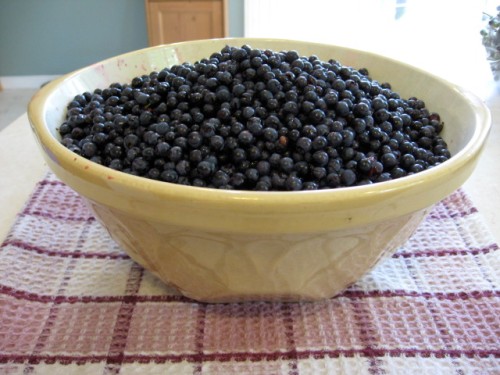
I’ve picked over the bunches of grapes, only keeping the ripe ones to get the sweetest fruit. Following the advice on this website, I wore latex gloves while picking the tiny grapes off the clusters, to protect my hands. It also made it a little less icky when I had to pick the numerous spiders and various other bugs out of the grapes as I was sorting them!

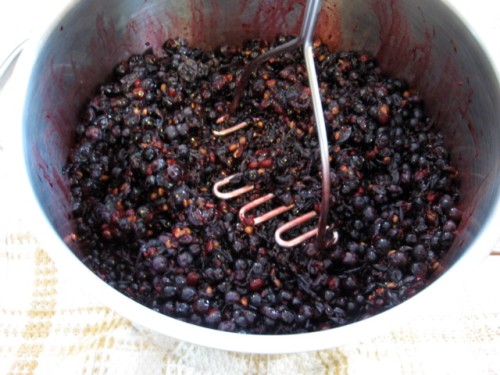
The next step is to mash the grapes before pressing them for juice:

In traditional wine-making, the skins and seeds are left in for the first stage of fermentation, but my research has recommended not to do that with wild grapes because the very high ratio of skins and seeds to juice would make the resulting wine too bitter.

This is my pressing set up:

A stainless steel colander is lined with damp cheesecloth. The mashed grapes are poured in, and then a plastic bowl that fits inside the colander goes on top of the grapes. A weight inside the bowl presses the grapes, and the juice collects in the bowl underneath.

And here is the result, exactly one liter of dark red grape juice. So the question is, do I make wild-grape wine (which would actually be more of a fruit wine like rhubarb or blueberry wine, rather than a true grape wine), or wild-grape flavoured mead with it? I’m leaning towards the wine, because in a normal “bad” year for wild grapes, I’m still likely to be able to collect enough to flavour mead, whereas I don’t know when we’ll have another really good summer for wild grapes… In either case, the juice is now going into the fridge overnight to let some of the tartrate precipitate out before I do anything further with it. And if I’m going to try to make wine, it might be worth the effort to harvest another batch of grapes for more juice, though let me tell you, separating out all the tiny grapes is very  tedious work indeed!

I will edit this post to include links to the next steps in the process as I document them:
Wild Wine: Part 2

Two Quilts

This is a “catch-up” post, one I meant to write months ago, but didn’t. It’s been a busy summer!

I made this throw-sized quilt for my husband’s cousin Jason, who married his long-time partner Jasmine in a beautiful, fun, and romantic wedding this spring:

It’s a simple charm square quilt of my own design, made from scraps and leftovers and a few fat quarters that I bought to get the different tones to balance the way I wanted them to. I decided on brown for a few reasons: Jason & Jasmine’s house is decorated mainly in light neutrals and dark woods so I thought it would match nicely; when I make a quilt as a wedding gift, I try to choose colours and styles that aren’t too “feminine”; and I had a lot of brown in the scrap bag! As it turns out (and I had no idea before-hand) brown is Jason’s favourite colour, and he got married in a gorgeous brown suit rather than the usual black! So the quilt was a big hit.

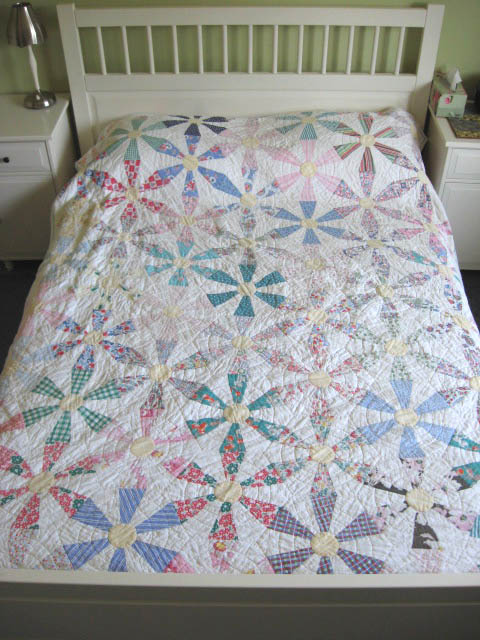
This quilt I bought at an auction at a neighbour’s house. It has a small amount of damage where some of the vintage fabrics have disintegrated, but it was going cheap, and I really liked the style and colours so I couldn’t resist. I paid $17.50 for it. Auctions are great for bargains sometimes! I don’t know who made it, but it was almost certainly made in this community, probably sometime in the 1940s.

I’ve decided to use it, rather than keep it carefully folded away somewhere, so I washed it on my machine’s “hand wash” cycle with gentle soap, and spread it out on the tall grass (on top of an old sheet to protect it from grass stains) to dry.

It has spent the summer looking absolutely lovely on our guest-room bed, but in a few days I’ll be putting it away for the winter. It also makes a great backdrop for cute kitten photos:

There’s another quilt in progress, which I hope to finish by the end of September. It’s going to be really, really lovely when it’s done, and I can’t wait to get it finished so that I can gift it to the sweet little baby girl who is waiting for it!